How to create the seo standard article with aiWriter24h.com?
This article helps you to create a seo standard article via aiWriter24h.com automatically. You should follow some steps bellow to do it:
1. Step 1: You have to Login into aiWriter24h.com. You can follow this article to do that "How to register an account and login into aiWriter24h.com?".
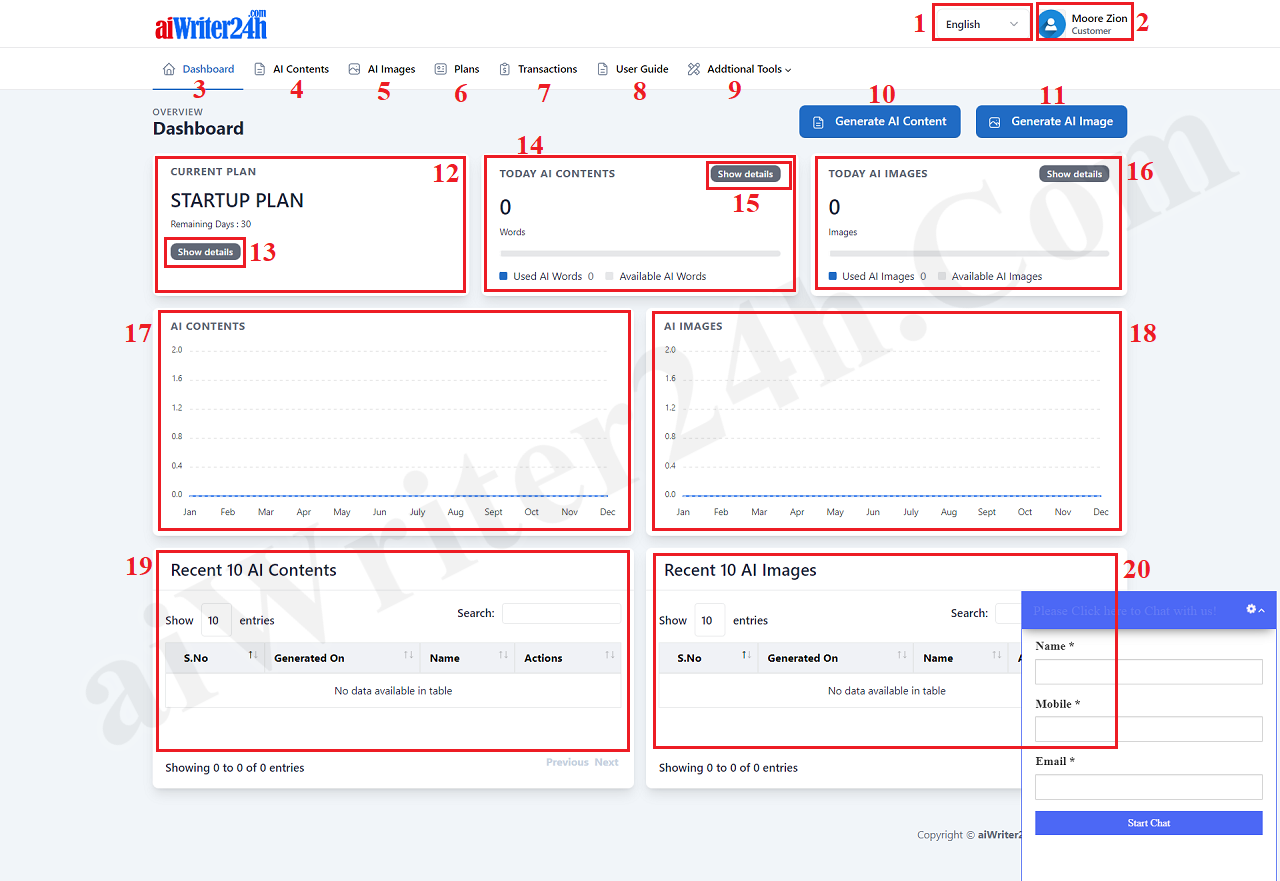
Picture 1: Dashboard Detail Interface
2. Step 2: Open List Of Ai Words Templates, you have to click on AI Words (4) menu or Generator AI Content (10) button so the templates window shows like picture 2 bellow:
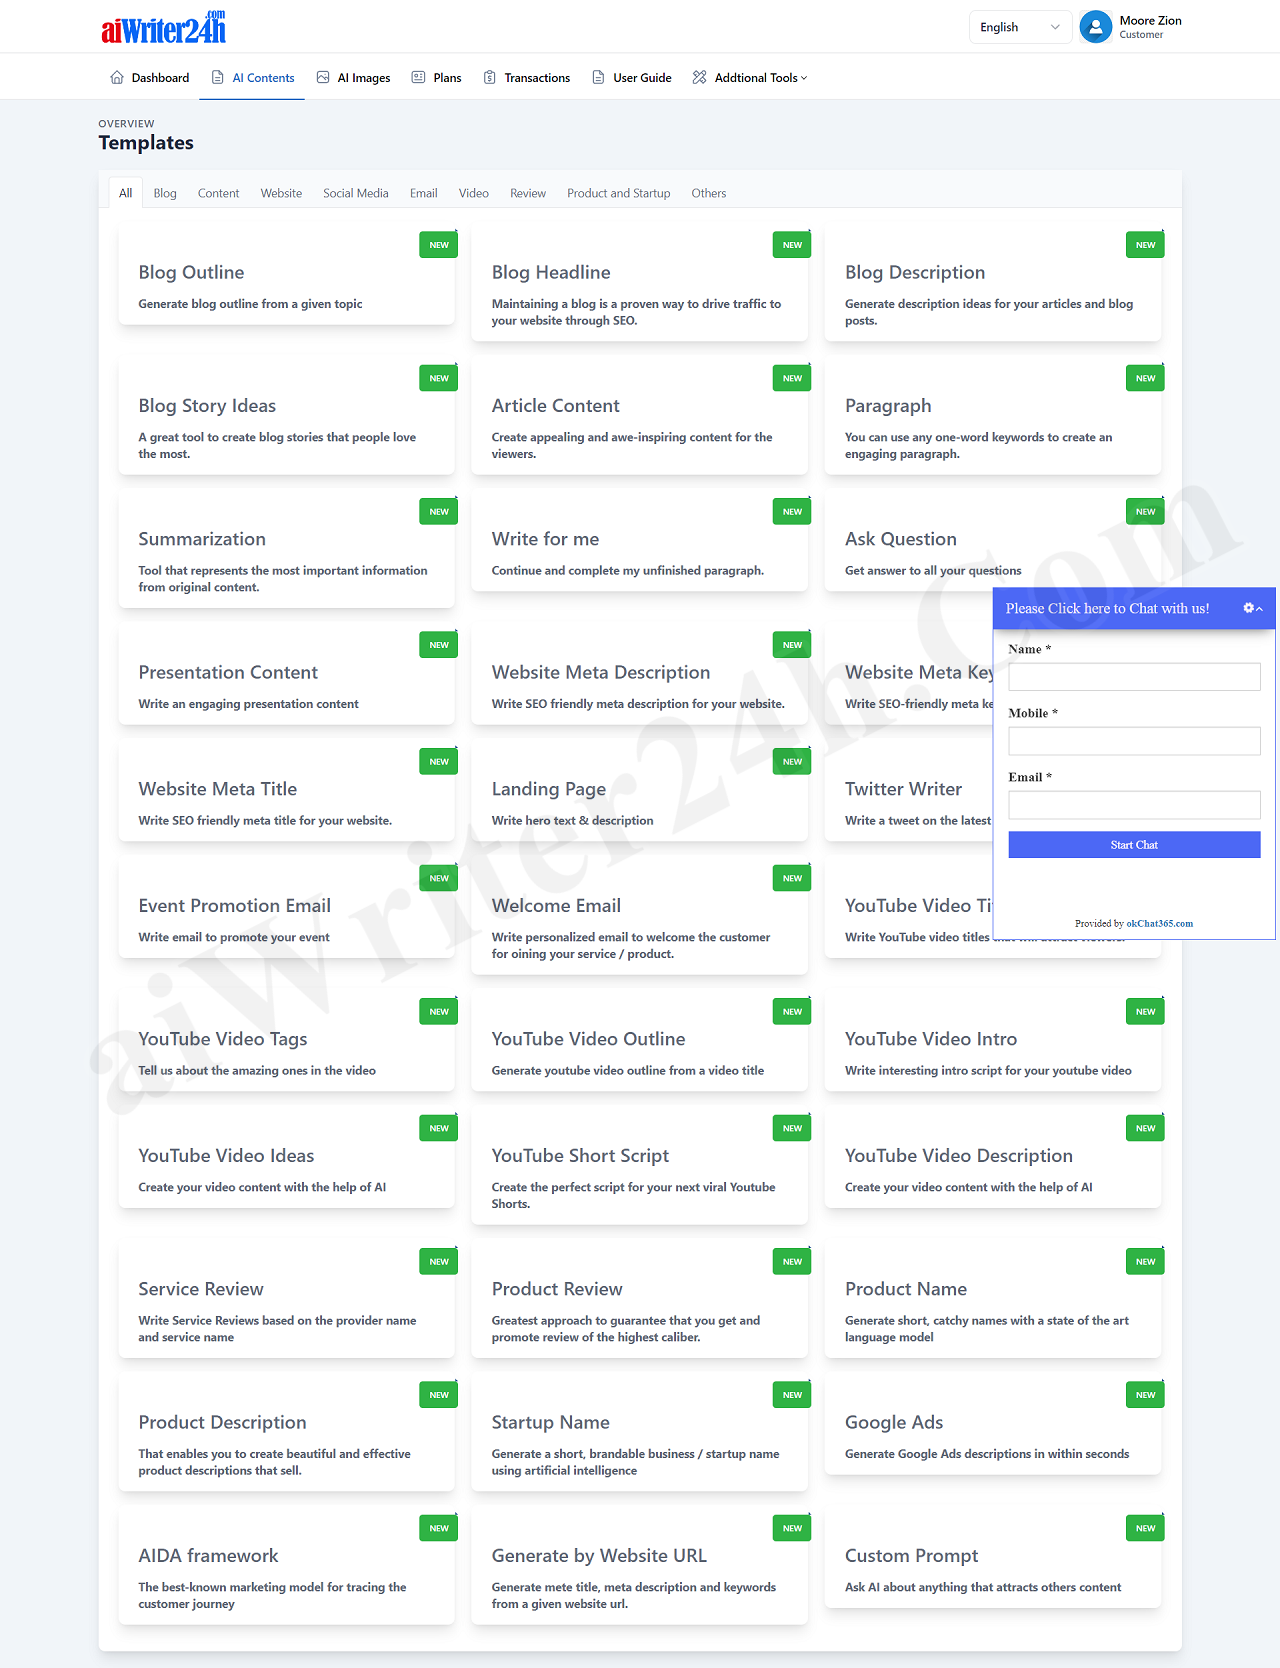
Picture 2: List of ai content templates
*Note: in this window, you can click on tabs like: All, Blog, Content, Website, Social Media, Email, Video, Review, Products and Startup, Others to filter the suitable templates.
3. Step 3: Generator a SEO Standard Article according to the following process:
3.1. Step 3.1: Create Title for Article with Blog Headline Template
Now you click on Blog Tab (like in Picture 2 above) to filter all templates that's suitable with this Tab => Next, You click on Blog Headline Block => Then you input all things for that form like Picture 3 bellow:
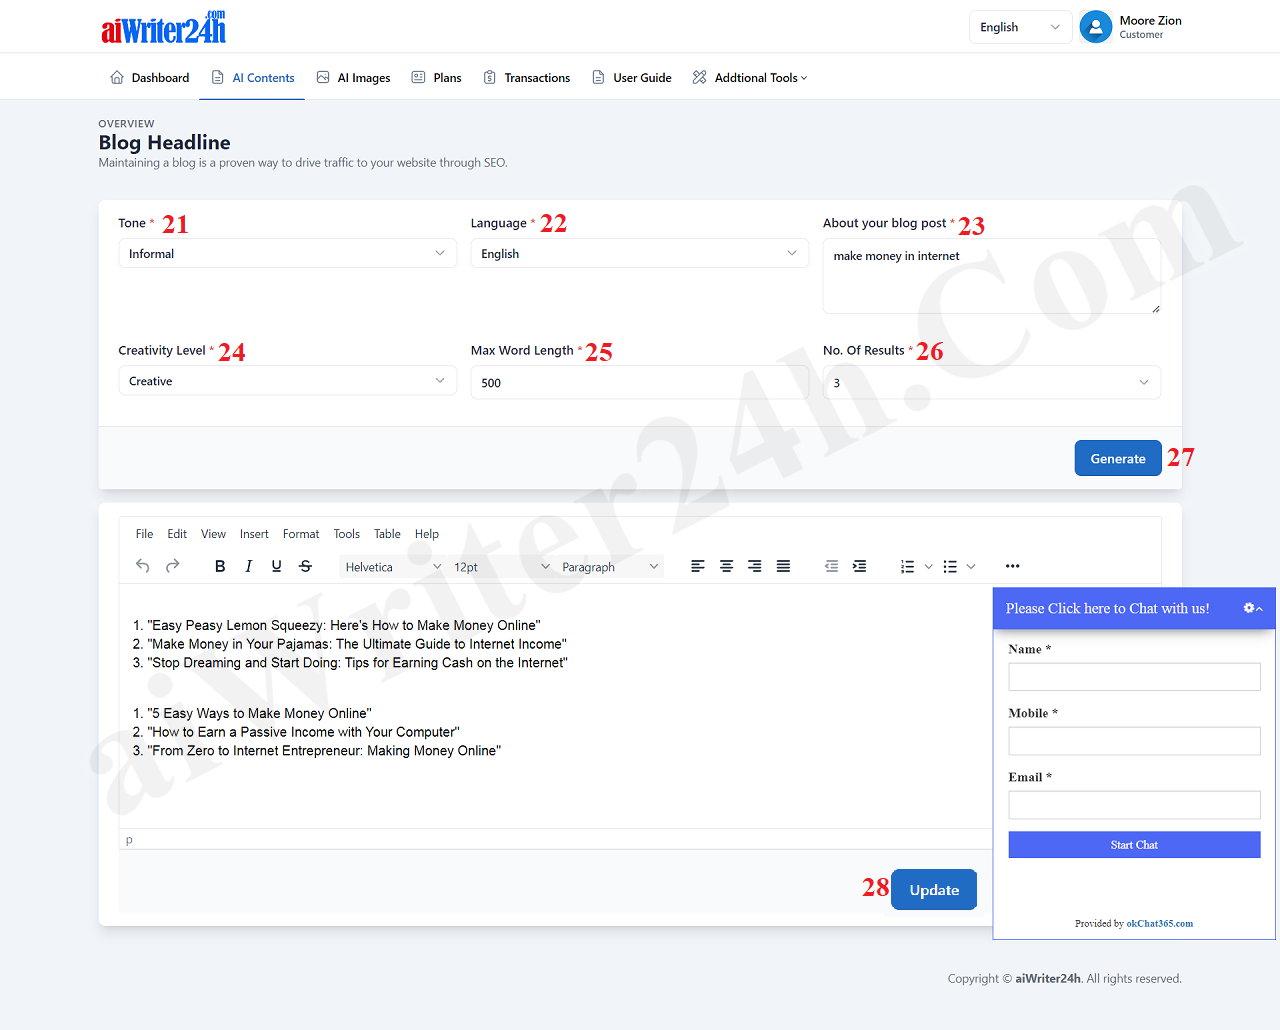
Picture 3: Generator the title of article with Blog Headline block
* Notes:
- Box with red star (*): You have to choose value or input value for it;
- Tone (21): You choose Tone for your title;
- Language (22): You choose language for your title;
- About your blog post (23): You input the content for your title here. It's suitable with Language in 22th box. In title of article, you should use main keywords for it. You can use Keyword Suggest Tool to get all keywords that your customers can find it in google. To use Keyword Suggest Tool, you click on Additional Tools (9) menu => you click on Keyword Suggest Tool option.
- Creativity Level (24): You choose the suitable Creativity Level for your article's title;
- Max Word Length (25): You input the value that's suitable with Max Word Length of title which's creating;
- No. Of Results (26): You choose the value that's suitable with number of results which's created by aiWriter24h.com automatically;
=> After you have just finished input all things in that form, you click on Generate (27) button to create title via aiWriter24h.com.
If It has the results so you click on Generate (27) button contunues so The generated results will be appended after the previous results.
But if you click on update (28) button then the results're saving in server. after that, if you click on Generate (27) button then the new results're saving in new article.
=> Now you choose the best result for your article, and move to next step - Step 3.2
3.2. Step 3.2: Create article's Outline
Now you click on Blog Tab (like in Picture 2 above)to filter all templates that's suitable with this Tab => Next, You click on Blog Outline Block => Then you input all things for that form like Picture 4 bellow:

Picture 4: Generator the article's outline
* Notes:
- Most things like Step 3.1;
- Blog topic (31): It's title of article that you had created and choose it after you finished Step 3.1 above;
=> After you click on Generate (35) button to generator Outline for your article so you should choose the best Outline then you copy it to word file to control easily;
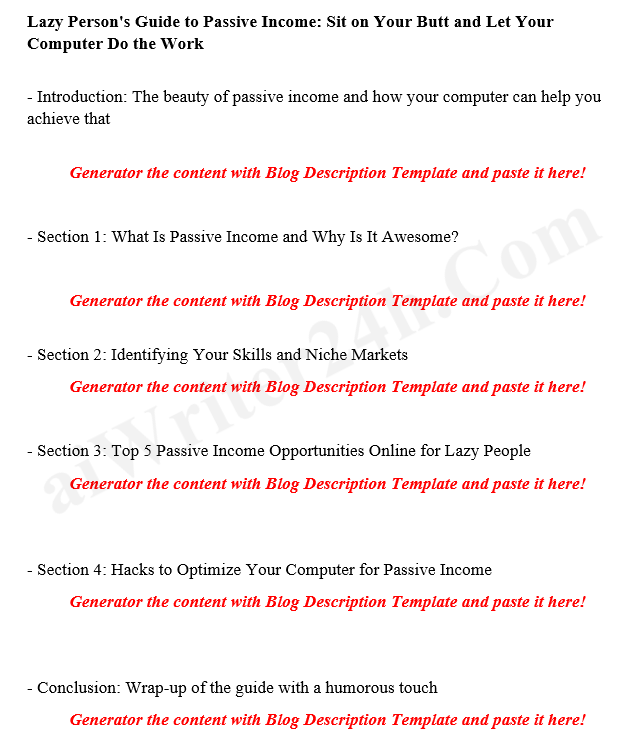
Picture 5: The Word file of Article's Outline
3.3. Step 3.3: Generator the content follows the article's outline
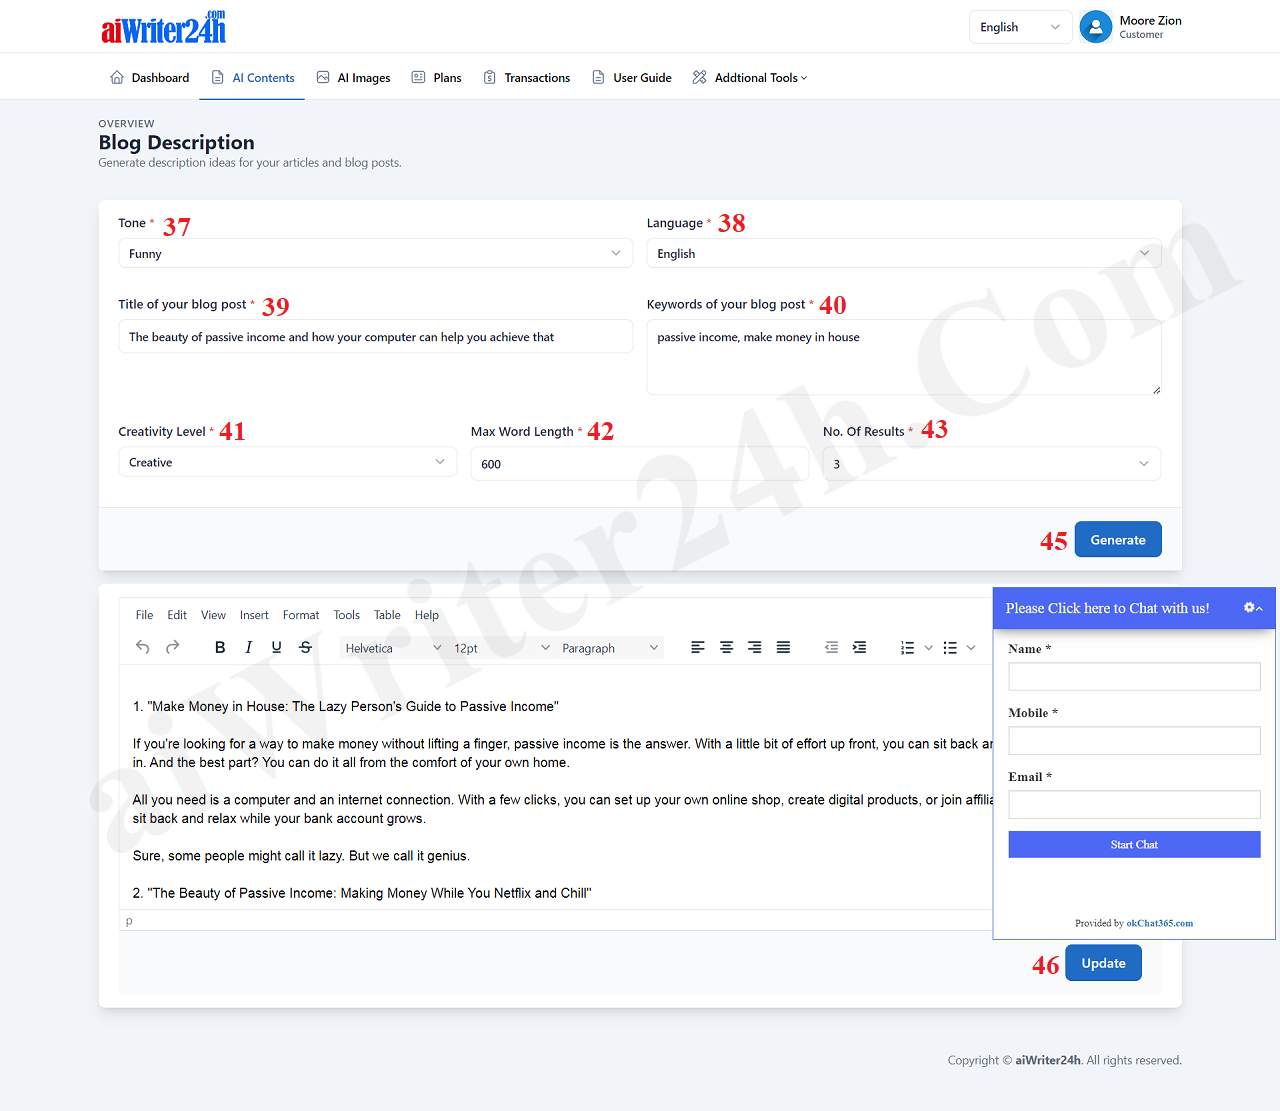
Now you click on Blog Tab (like in Picture 2 above) to filter all templates that's suitable with this Tab => Next, You click on Blog Description Block => Then you input all things for that form like Picture 6 bellow:
Picture 7: Generator the content follows the Article's outline
* Notes:
- Most things like Step 3.1;
- Title of your blog post (39): It's article headline that's suitable with Article's Outline; First, you do it for Introduction part => next for Section 1 => Next for Section 2 => Next for Section 3 => Next for Section 4 => Final for Conclusion.
With each the result of part of the article's outline that you have just generated from this Step, so you save it into word file for the suitable part of the article's outline;
- Keywords of your blog post (40): You input some keywords here that's suitable with your content. You can use Keyword Suggest Tool to get all keywords that your customers can find it in google. To use Keyword Suggest Tool, you click on Additional Tools (9) menu => you click on Keyword Suggest Tool option.
=> When you finish to input all things for this form, you click on Generate (45) button to create the content for this part of the article's outline. Then you copy it and paste it in your word file.
=> After that, you process this step for remain parts of the article's outline;
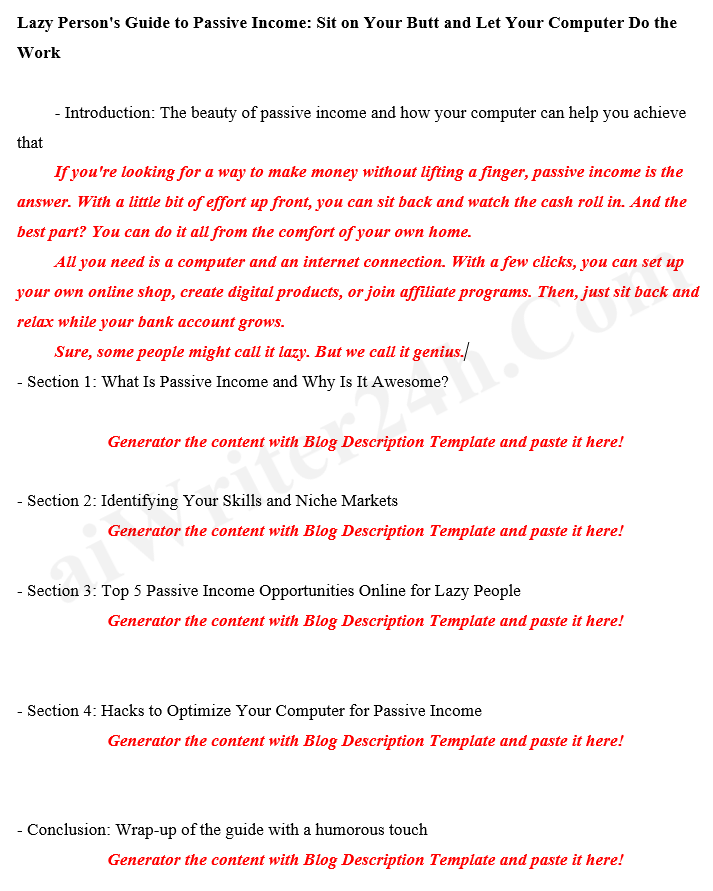
Picture 8: the word file after you paste the content of introduction part that's suitable with the article's outline
=> Now you continue to work on the rest of the article according to its outline.
3.4. Step 3.4: You need to check the grammar of the article for logic
When you finished Step 3.3 so you should check the grammar of the article for logic before you publish it to your website or blog...
=> That's All!
Was this article helpful?